


If you’ve lived in a Springfield home for more than a few years, you’ve probably noticed it — a hairline crack creeping above a doorway, a dime-sized dent where a door knob met the wall, or maybe a section of drywall that looks like it’s bowing inward. These things happen. Missouri’s humidity swings, settling foundations, and everyday life take a toll on your walls.
But here’s what most homeowners don’t realize: drywall damage isn’t always just cosmetic. That crack near the ceiling could be a signal that something structural is shifting. That water stain under the bathroom? It might mean a slow leak eating away at the drywall behind the paint. Before you reach for the spackle, it pays to understand what you’re really dealing with.
Common Drywall Issues and What They Really Mean
| Issue | Likely Cause | DIY or Pro? | Risk if Ignored |
|---|---|---|---|
| Hairline cracks above doors/windows | Normal settling or seasonal expansion | DIY if stable; Pro if recurring | Cracks widen; paint peels along joint |
| Nail pops (small bumps in wall) | Wood framing drying/shrinking behind drywall | DIY for isolated pops | Multiple pops may indicate structural movement |
| Small holes (nails, screws, anchors) | Everyday wear — hanging shelves, pictures, etc. | DIY | Minor cosmetic concern only |
| Medium holes (doorknob, fist-sized) | Impact damage from doors, furniture, kids | DIY-savvy homeowner or Pro | Weakens wall section; looks unsightly |
| Water stains or bubbling paint | Moisture intrusion — leaky pipe, roof, or condensation | Pro — find the source first | Mold growth, drywall deterioration, structural decay |
| Large holes or sagging sections | Major impact, plumbing repair access, or prolonged water damage | Pro | Structural weakness; potential for collapse or hidden mold |
| Cracks along tape seams | Poor original taping job or foundation movement | Pro for lasting fix | Continues to crack; indicates ongoing movement |
Understanding what’s behind the damage is half the battle. A hairline crack that reappears after every Springfield summer probably means the house is still settling — and patching it over and over won’t solve a thing. On the other hand, a single nail hole from a picture frame? That’s a quick DIY win.
When You Can Handle Drywall Repair Yourself
Not every drywall problem requires a professional. If you’re comfortable with basic tools and have a little patience, some repairs are absolutely within reach:
- Small nail and screw holes — A dab of spackle, a quick sand, and a touch of paint are all you need.
- Minor dents and dings — Use a putty knife to apply joint compound in thin layers, sand smooth between coats, and repaint.
- Single nail pop — Drive a new screw near the pop, dimple it slightly, and cover with joint compound.
- Small cracks (under 6 inches) — Apply mesh tape over the crack, then coat with two to three layers of joint compound.
For small repairs, the process is straightforward. But remember — the repair is only as good as the finish. If you can see the patch after painting, it’s going to bug you every time you walk past it. That’s where blending the texture and feathering the edges of your joint compound really matters. If you’re planning to freshen up your walls with new paint, even a so-so patch can disappear under a quality paint job.
Your DIY Drywall Patch Checklist
- ☐ Spackle or joint compound (all-purpose works for small jobs)
- ☐ Putty knife (4–6 inch for small patches)
- ☐ Fine-grit sandpaper (120–220 grit)
- ☐ Self-adhesive mesh tape (for cracks and medium holes)
- ☐ Matching paint for touch-up
- ☐ Primer (only if patch is larger than a quarter)
- ☐ Texture match spray (if your walls have orange peel or knockdown texture)
When It’s Time to Call a Professional

Some drywall repairs look simple on the surface but have more going on underneath. Here’s when you should skip the DIY and bring in someone who does this for a living:
Water Damage
Anytime you see water stains, bubbling paint, or soft spots in drywall, there’s moisture involved. You can patch the wall all day long, but if you don’t fix the leak behind it, the damage comes right back — and it gets worse. In Springfield’s humid climate, mold can start growing within 48 hours on damp drywall. A professional will identify the source of the moisture, replace compromised drywall, and ensure everything is properly sealed before refinishing. If you’re dealing with recurring moisture, professional drywall repair isn’t optional — it’s necessary.
Large Holes or Structural Concerns
Anything bigger than your fist typically requires cutting out the damaged section, installing backing, and fitting a new piece of drywall. Getting the seams tape-ready and blending the texture takes skill. DIY patches on large holes tend to look exactly like what they are: patches. Worse, if the surrounding drywall has lost structural integrity, a patch won’t hold. For larger repairs, our home remodeling team can assess whether the wall needs more than just a surface fix.
Recurring Cracks
If you’ve fixed the same crack twice and it keeps coming back, the wall is telling you something. Recurring cracks — especially near corners of windows, doors, or along the ceiling — often indicate foundation movement or framing issues. Patching over them is like putting a band-aid on a broken arm. A professional can evaluate whether the crack is cosmetic or symptomatic of a larger issue.
Texture Matching
Springfield homes have a lot of knockdown and orange peel textures. Matching these textures so a patch disappears into the surrounding wall is tricky. If you’ve ever seen a smooth square on an otherwise textured wall, you know how obvious a bad texture match can be. Professionals have the tools and experience to replicate your wall’s existing texture.
The Drywall Repair Process: What to Expect
Whether you DIY or hire a pro, understanding the correct process helps you know what a proper repair should look like:
- Assess the damage — Determine the cause and extent. If moisture is involved, find and fix the source first.
- Prepare the area — Remove loose material, cut back damaged drywall to clean edges, and vacuum out dust.
- Install backing (for larger holes) — Wood strips or drywall clips give the new piece something to screw into.
- Cut and fit the patch — A new piece of drywall is cut to fit snugly into the opening.
- Tape the seams — Mesh or paper tape covers the joints between the patch and existing wall.
- Apply joint compound — Three thin coats, each feathered wider than the last, build up a seamless transition.
- Sand smooth — Once fully dry, sand the compound flush with the wall. No ridges, no bumps.
- Match texture — Apply texture to blend the patched area with the surrounding wall.
- Prime and paint — Primer seals the repair; paint finishes the job. This is where interior painting expertise makes all the difference.
Skip any step, and the repair shows. That’s the number one reason DIY patches stand out — not because the compound was wrong, but because the process was rushed.
Why Drywall Repair and Painting Go Together
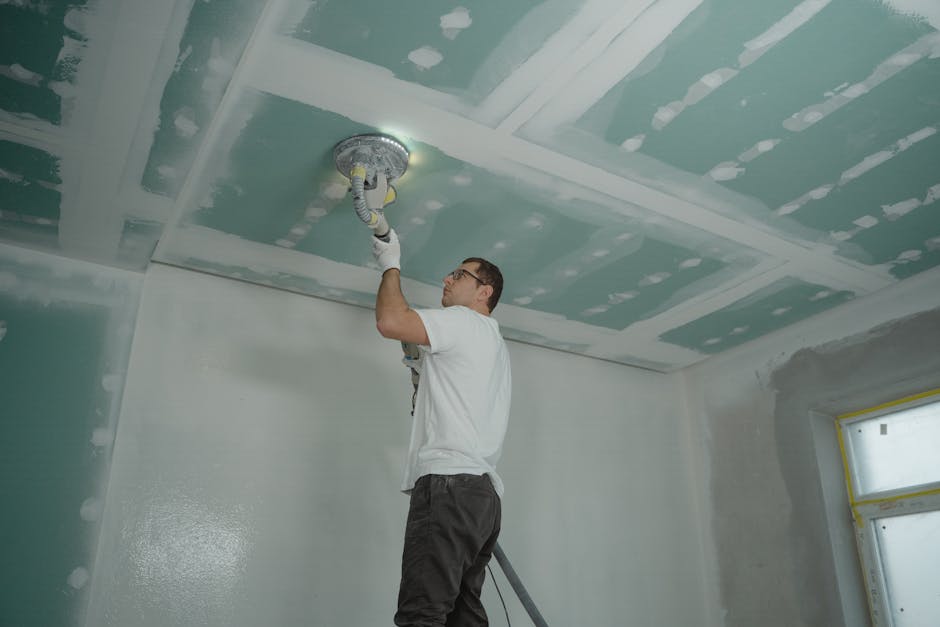
Here’s something most homeowners don’t think about: drywall repair and painting aren’t two separate projects — they’re two halves of the same job. A drywall patch without proper paint blending is always going to be visible. And a new paint job over damaged drywall? That just highlights every dent, crack, and imperfection.
When you hire a team that handles both drywall repair and interior painting, you get a seamless result. The person patching the wall knows exactly how the paint will interact with the repair. The painter knows what’s under the surface. There’s no miscommunication between trades, no scheduling headaches, and no finger-pointing if something doesn’t look right.
At First Impressions Painting, we handle drywall repair as part of our painting process because we know that the best paint job in the world won’t look good on a bad wall. If you’re planning a room refresh, check out our project gallery to see how combined drywall repair and painting transforms spaces.
Springfield-Specific Drywall Challenges
Living in the Ozarks means your drywall faces some unique regional challenges:
- Humidity swings — Springfield summers are hot and humid, winters are dry. This constant expansion and contraction stresses drywall joints, especially in older homes.
- Clay soil and settling — The Ozarks region has expansive clay soils that shift with moisture changes. Foundation movement often shows up first as drywall cracks, particularly around windows and doors.
- Storm damage — Severe weather can cause roof leaks that travel down into walls before you even notice a problem on the ceiling.
- Pest intrusion — Missouri is home to termites and carpenter ants that can damage framing behind drywall, causing sagging or soft spots you might mistake for water damage.
If you’re noticing cracks that keep returning or soft spots in your walls, don’t just keep patching. Have someone take a closer look. Our service area covers Springfield, Ozark, Nixa, Republic, and Battlefield — so whether you’re in an older home near downtown or a newer build in the surrounding communities, we understand the local conditions that affect your walls.
How to Decide: DIY or Professional Repair?
Ask yourself these questions before grabbing the spackle:
- Is the damage smaller than a golf ball? — DIY is reasonable if you’re patient and detail-oriented.
- Is there any sign of water or mold? — Call a pro. No exceptions.
- Has the crack appeared more than once? — Get it evaluated. Patching over a recurring problem wastes your time.
- Is the damaged area highly visible? — Entryways, living rooms, and hallways deserve a professional finish. A bad patch in a closet is one thing; a bad patch next to your front door is something else entirely.
- Are you already planning to repaint the room? — This is the perfect time to handle all repairs at once. Combine drywall repair with your remodeling project for the best results.
Getting Your Walls Right
Drywall repair isn’t the most glamorous part of home improvement, but it’s one of the most important. Your walls are the backdrop of every room. When they’re smooth, clean, and well-maintained, everything else in the space looks better. When they’re cracked, dented, or patched badly, that’s all anyone notices.
Whether you’re dealing with a few nail holes from rearranging pictures or a section of water-damaged drywall that needs full replacement, taking the right approach matters. Small repairs done right can last for decades. Small repairs done wrong will show through every paint job until you fix them properly.
If you’re ready to get your walls back in shape, take a look at our drywall repair services or browse our past projects to see the kind of results you can expect. From simple patches to full home remodeling that includes drywall, painting, and trim work, we help Springfield homeowners get walls worth looking at.
And if you’re in any of the surrounding communities — Ozark, Nixa, Republic, or Battlefield — we serve those areas too. First Impressions Painting is proud to be your local drywall and painting resource throughout the Springfield area.